2003-2004 Trailblazer IPC Removal Instructions
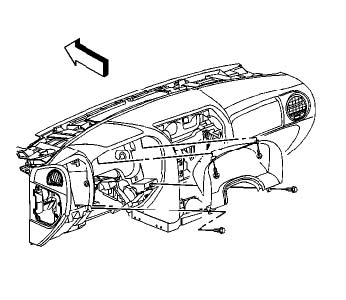
BEZEL - INSTRUMENT PANEL (I/P) CLUSTER REMOVAL PROCEDURE

1. Tilt the steering wheel to the full down position.
2. Remove the left closeout/insulator panel .
3. Remove the knee bolster trim panel.
4. Remove the screws that retain the bezel to the instrument panel.
5. Remove the bezel from the instrument panel.
INSTALLATION PROCEDURE:
1. Install the bezel to the instrument panel.
2. Install the screws that retain the bezel to the instrument panel.
3. Tighten the screws to 2.5 N.m (22 lb in) .
4. Install the knee bolster trim panel.
5. Install the left closeout/insulator panel
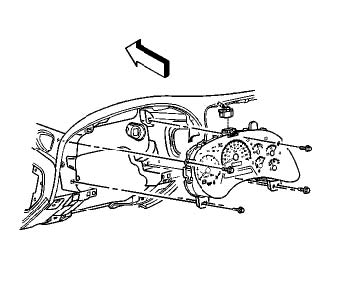
REMOVAL PROCEDURE:

1. Remove the left closeout insulator panel.
2. Remove the knee bolster trim panel.
3. Remove the instrument panel (IP) accessory trim plate.
4. Remove the screws retaining the IPC to the IP.
5. Partially remove the IPC from the IP in order to gain access to the electrical
connector.
6. Disconnect the electrical connector from the IPC.
7. Remove the IPC from the IP.
INSTALLATION PROCEDURE:
1. Position the IPC to the IP.
2. Connect the electrical connector to the IPC.
3. Install the IPC to the IP.
4. Install the screws to instrument panel cluster. NOTE : Refer to Fastener Notice in Service Precautions. Tighten the screws to 2.5 N.m (22 lb in) .
5. Install the instrument panel (IP) accessory trim plate.
6. Install the knee bolster trim panel.
7. Install the left closeout insulator panel.
Download a pdf of these instructions here
